Day 7 - Make your own Bird Feeder
Day 7 - Make your own Bird Feeder
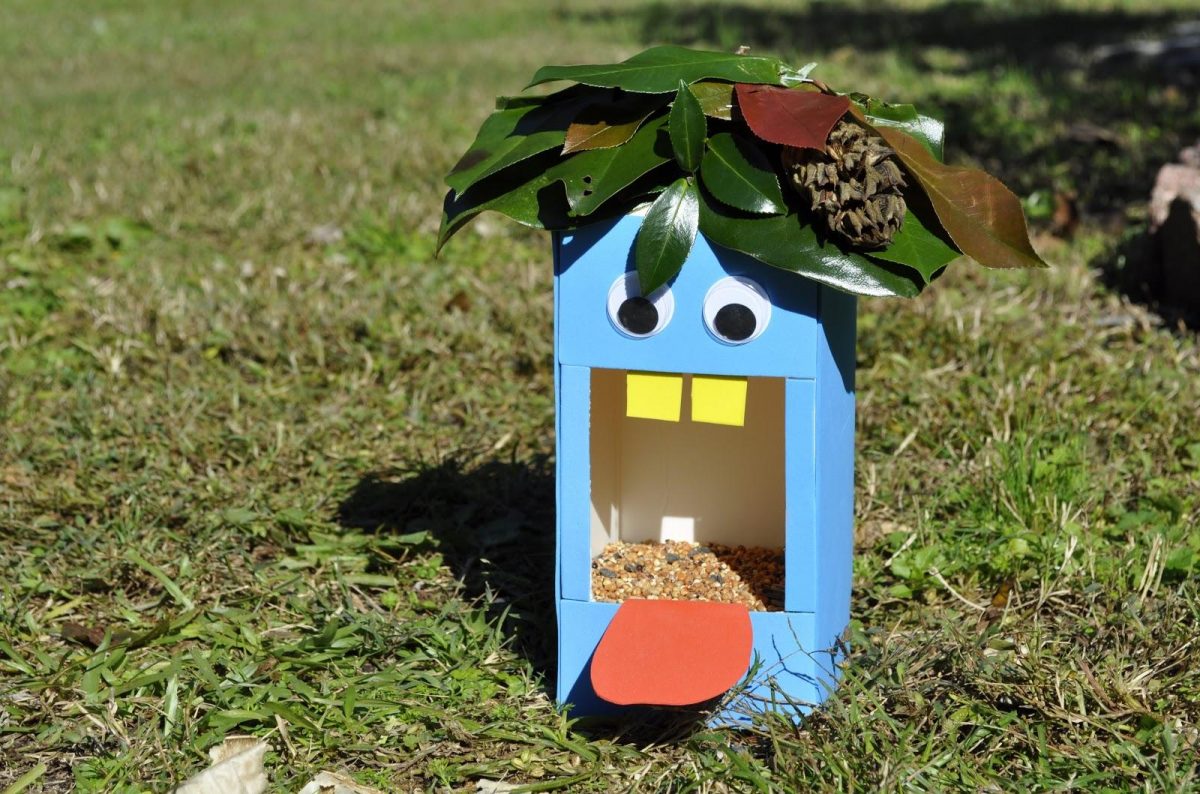
Welcome to day 7 of the Stay at Home Art Club Kids Challenge, we have completed our first week of wonderful art challenges together already! Today we have a weekend challenge for you, create your own Bird Feeder! Why not take some time this weekend together as a family and make this great DIY bird feeder and see what birds come and visit your garden. Even if you don't have a garden this is still the perfect challenge for you as you can just hang it outside your window and watch all the beautiful birds that stop by to feed. Remember to send us in pictures of the bird feeders you make on Instagram and Facebook so we can share them online! Why not check out the RSPB's website to learn more about birds and bird watching on: https://www.rspb.org.uk/birds-and-wildlife/wildlife-guides/birdwatching/ Share any pictures with us of the birds that you see, see if you can use the RSPB bird guide to identify them too!
To make the bird feeder you will need:
You will need:
- An empty juice carton
- Scissors
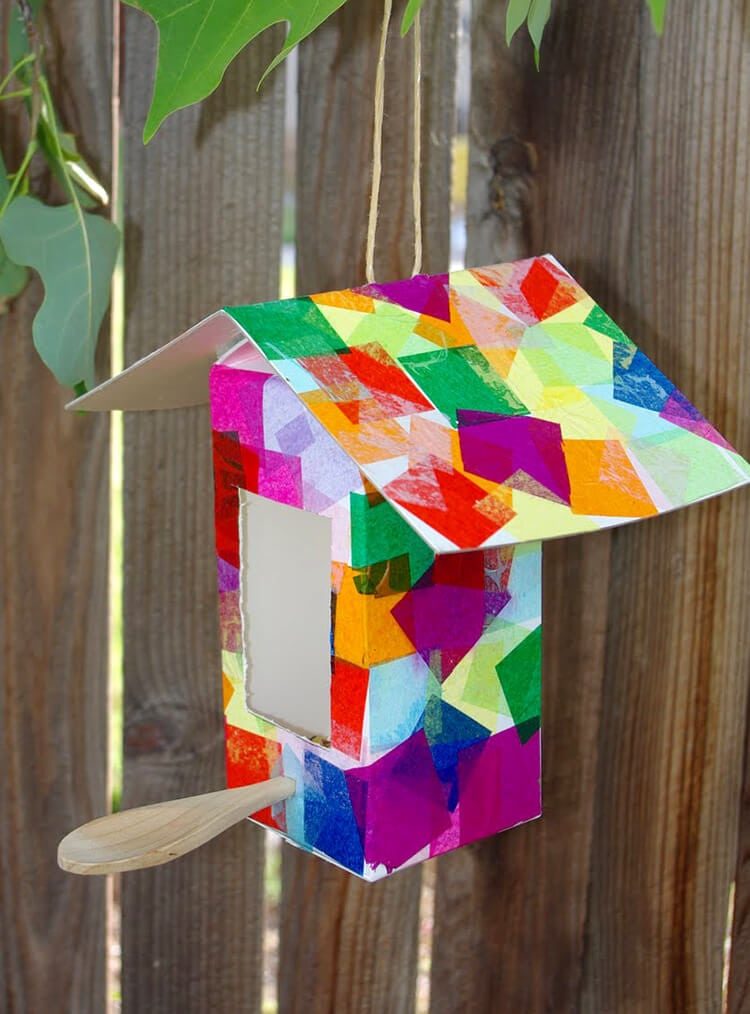
- paints, pens, or tissue paper and glue to decorate the carton with
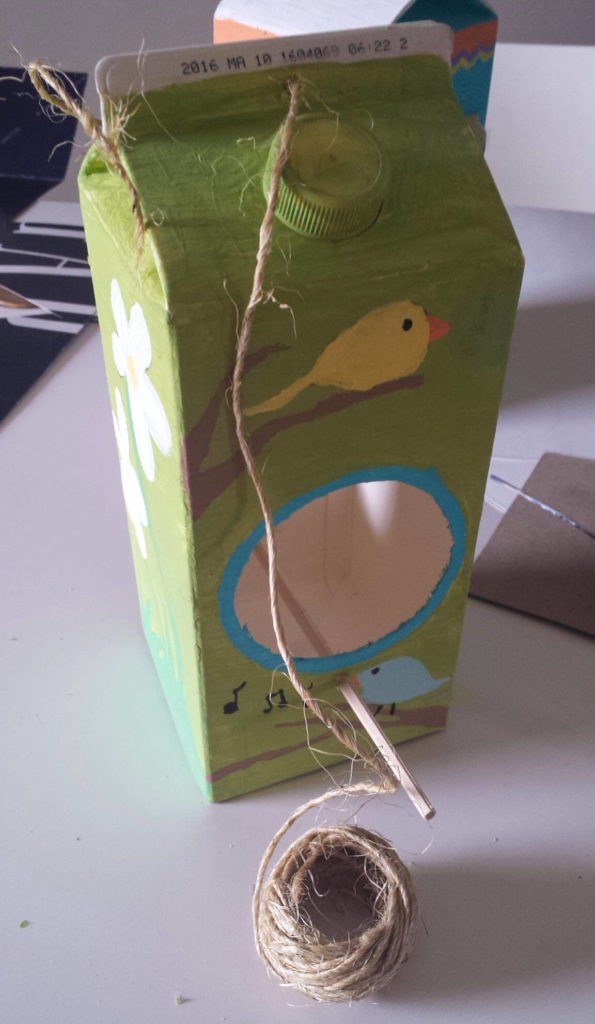
- string
- an old chopstick, pencil or wooden spoon
STEP 1: Clean out the carton with warm water.
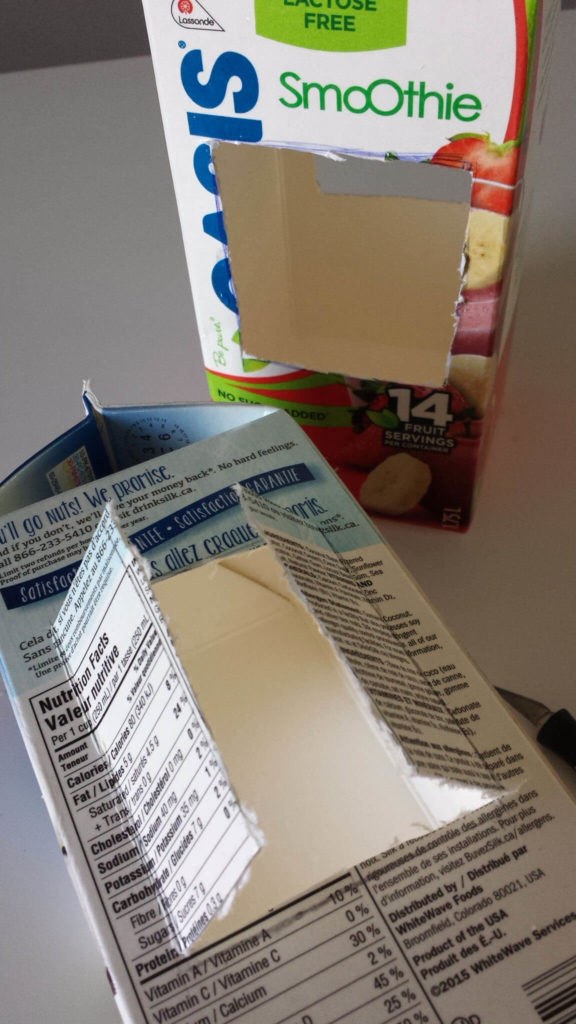
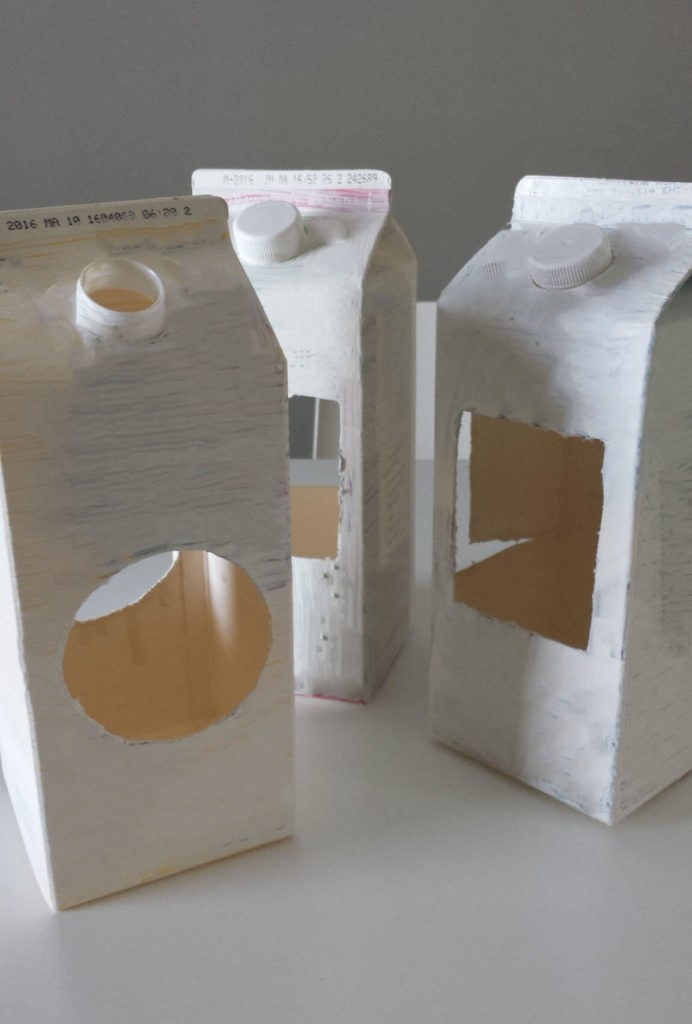
STEP 2: Draw a large rectangle or circle on either side of the carton and cut it out so there is an opening big enough for a bird to get in.
STEP 3: Put an old table cloth or some newspaper down to protect the surface you are working on and paint your carton white so it is ready to decorate.
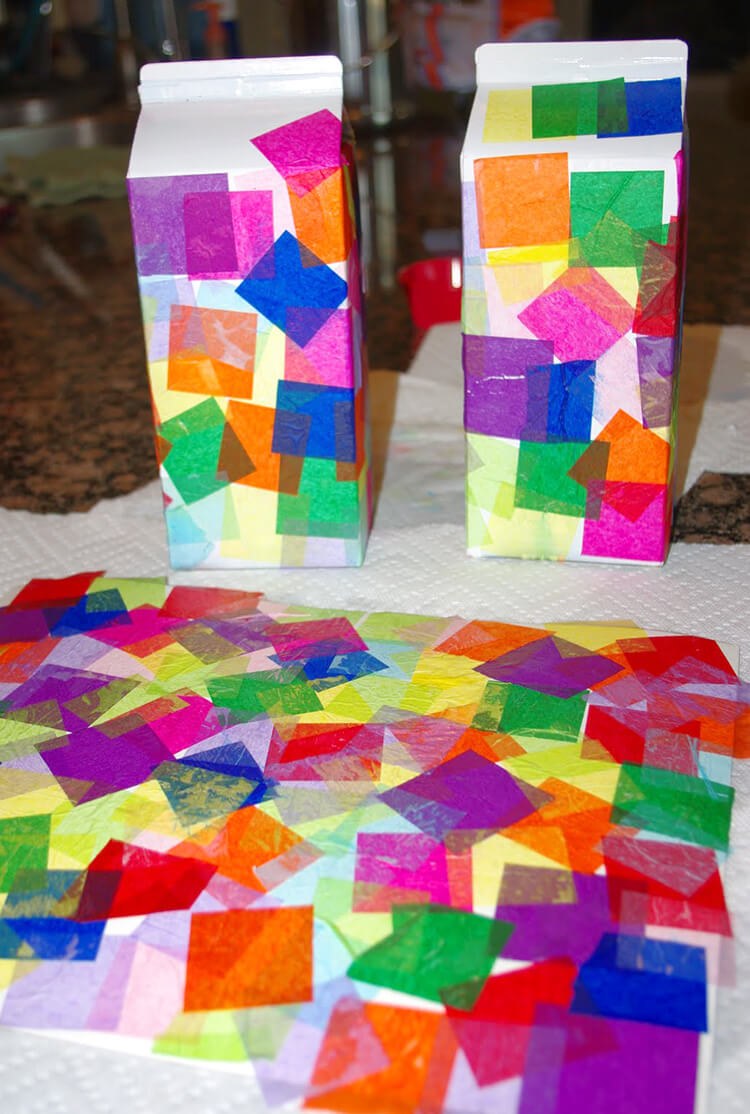
STEP 4: DECORATE! Now comes the fun part, time to design and decorate your bird feeder. Have a look at the designs at the bottom of the page for inspiration. You can use a pencil to sketch your design on the bird feeder before painting or colouring it. If you are using tissue paper then simple use your glue stick to coat the carton and stick down your tissue paper in any pattern you like.
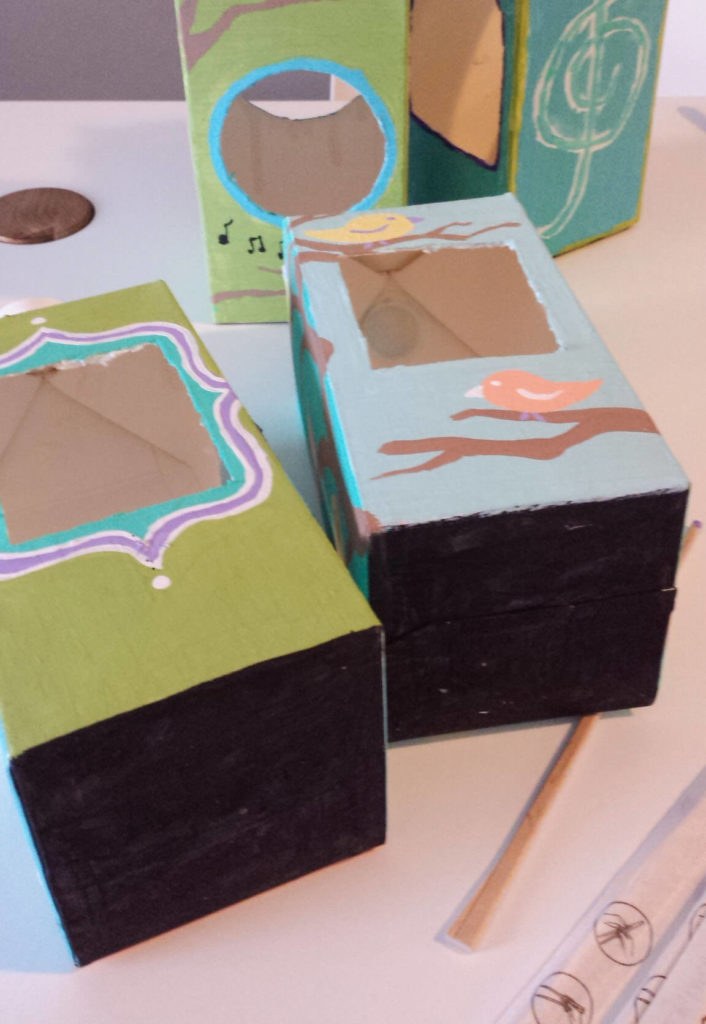
STEP 6: Once the paint is dry then make a small incision in the shape on an x about 2 inches below each opening for your chopstick or wooden spoon to slide through for the bird to sit on. Put the chopstick or wooden spoon through the opening you have made.

STEP 7: Pierce the middle of the top of the carton with a pair of scissors and create a small opening for the string to go through. Insert your string and tie in a loop so it is ready to hang on a tree or outside your window.
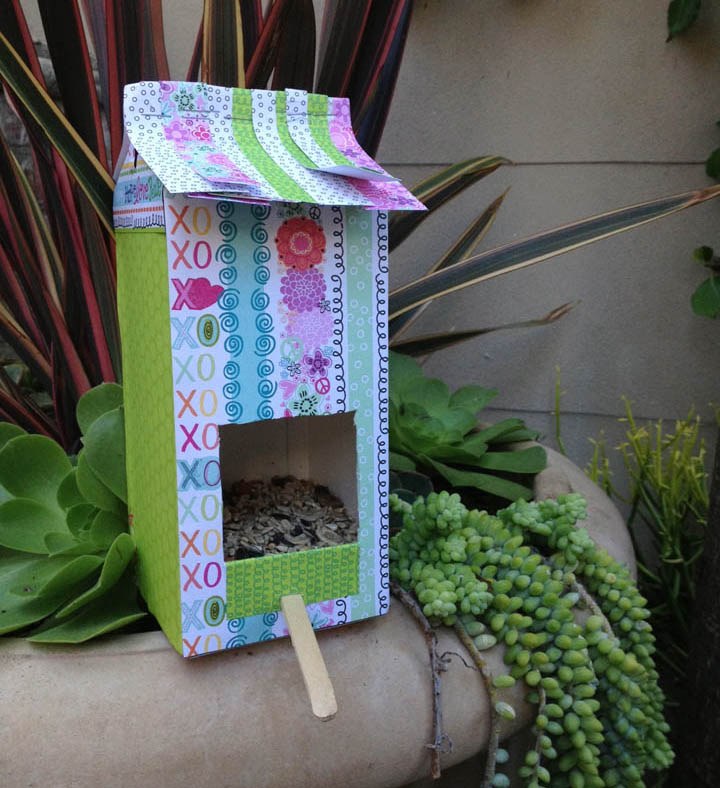
STEP 8: Fill the bird feeder with seeds to feed the birds, such as
- Sunflower.
- Safflower.
- Nyjer or thistle.
- White proso millet.
- Shelled and cracked corn.
- Peanuts.
- Milo or sorghum.
- Golden millet, red millet, flax, and others
STEP 9: Hang the bird feeder in the garden or outside your window and watch all the beautiful birds that come to feed!
Todays challenge comes to us thanks to https://www.fancymomma.com/milk-carton-juice-carton-bird-feeder/ and https://www.happinessishomemade.net/collage-birdhouses/

- Your Venue
- Your Venue
- Your Visit
- Your Visit
- How to Book
- How to Book
- Venue Hire
- Venue Hire
- Springhall Artist Residencies
- Meet Our Team
- Open Doors to Culture Strategy 16-21
- Our Creative Tenants
- Safeguarding
- Terms and Conditions
- GRANTS & BURSARIES
- Meet the Team
- Safeguarding
- Wayward | Sarah Wren Wilson | 4 Apr - 29 May
- 30 Years of Roe Valley Cycling Club
- GRANTS & BURSARIES
- Looking at God | Stephen Wilson & John Brown | 6 June - 11 July
- Wanderlore | 25 July - 25 September
- Steinbeck Festival Children’s Book Covers | 14 Feb - 21 Mar
- This Land Was Made For You and Me | Steinbeck Dustbowl Photograph Exhibition | 14 Feb - 21 Mar
- Somewhere | Karl Hagan | 5 Jan - 7 Feb
- This Beyond | Stuart Quigley | 11 April – 23 May
- The Decoration of Absence | James Hughes | 30 May - 27 June
- The Holocaust Memorial Day 2026 | 26 Jan - 21 Mar
- The Sea we Share | Czacarri Muli, EM Emerson & Corinna Askin | 4 July - 29 August
- The Daintifyt Years | 26 Sept- 28 Feb
- Red Sails Festival 2026 | People of Portstewart
- TEND/ER | LORNA WATKINS | 13 SEPT - 31 OCT
- For The Love of Dog (And Other Creatures) | Eleanor Wheeler | 14 Feb- 28 Mar
- LIMAVADY ART GROUP | 7 NOV - 19 DEC
- ACNI | Digital & Immersive Showcase | 22-24 Jan
- PAVESTONE COLLECTIVE | 7 NOV – 19 DEC
- THE POOKA PARTY & OTHER STORIES | 2 - 30 AUG
- ON GROWING OLD | HARRY MCMAHON | 13 SEPT - 25 OCT
- BIG DOODLES AND WEE DOODLES | JOHN MCMACKEN | 3 APRIL - 16 MAY
- POSTCARDS (Ghostwritten) | 24 MAY – 29 JUNE
- INTERNATIONAL REFUGEE WEEK | 21 – 30 JUNE
- THIN PLACE | BOB SPEERS | 15 MARCH - 26 APRIL
- STEINBECK DUSTBOWL PHOTOGRAPHY | LEAVING | 3 FEBRUARY – 22 MARCH
- THE STEINBECK CONNECTION CHILDREN’S BOOK COVER EXHIBITION | 22 FEBRUARY - 22 MARCH
- HERE, THERE & THEM: CONTEMPORARY IRISH ART FROM THE ACNI COLLECTION | 11 JANUARY - 1 MARCH
- LIFE AND TIMES IN LIMAVADY | 2 JANUARY– 1 MARCH
- THE WAY I SEE IT | UPPER GALLERY | 8 MARCH - 26 APRIL
- anama | anne mcalarney | 11 JANUARY - 1 FEBRUARY
- ALL US WOMEN - Janey Moffatt | 7 September - 26 October
- HOLOCAUST MEMORIAL DAY 2025 | 23 JANUARY - 1 FEBRUARY
- CAUSEWAY CRAFT TRAIL MAKERS SHOWCASE
- LIMAVADY ART GROUP | DUNGIVEN REGENERATION CLUB
- MY CARDBOARD COAST TOWN
- ATHRÚ | STUART QUIGLEY | 7 Sept – 27 Oct
- FIRST THEY IGNORE YOU | Sheila Chakravarti | 9 March – 20 April
- TADA! | 3 - 31 AUGUST
- HIDDEN CREATIVITY | North West Regional College | 6 January – 24 February
- WE ARE THE DREAM WEAVERS | 3 -31 AUGUST
- CONCURRENT | 13 APRIL - 18 MAY
- PROCEED AS NORMAL | 13 April - 18 May
- BIRDS WITH NO PASSPORTS | John Brown
- BRUMOUS | Aidan Crotty | 12 January – 16 February
- STEINBECK DUSTBOWL PHOTOGRAPHY EXHIBITION: PEOPLE | 24 February-30 March
- Reflections - A Retrospective by John Johnson | 9 September to 28 October 2023
- THE STEINBECK CONNECTION PRIMARY SCHOOLS ART EXHIBITION | 10 February-30 March
- Puffin Rock by DOG EARS & CARTOON SALOON | 8 July to 26 August 2023
- THREADS & STITCHES | 11 March - 15 June
- Woven Hug | 6 July - 26 August
- MAPPING MONUMENTS | 7 March - 29 June
- Stitching A Story by WILMA KIRKPATRICK | 1 July to 26 August 2023
- Visual Memories in Glass by Pupils of St. Colum's & Portstewart PS | 27 May to 3 June 2023
- Still I Rise by DEIRDRE ROBB | 20 May to 24 June 2023
- Spring Exhibition by ULSTER SOCIETY OF WOMEN ARTISTS | 1 April to 13 May 2023
- Uncertain Landscapes by ALEX DEWART & HEATHER MCATEER | 18 February to 25 March 2023
- Creative Voices: What Autism Means to Me I 7 Jan - 11 Feb 2023
- Disruptive Women by CONFLICT TEXTILES | 8 February to 5 August 2023
- Reflection by CATHAL MCNAUGHTON | 10 September to 5 November 2022
- Causeway Craft Trail Showcase | 18 June - 31 August 2022
- Causeway Coast by SARAH CARRINGTON | 5 February to 26 March 2022
- Robert Sellar Print Collection | 13 Jan - 29 Jan 2022
- Close to Home by Maurice Orr | 16 June - 24 July 2021
- Isolation in Lockdown by Pavestone Collective
- Tribes and Tribulations - Helen Merrigan Colfer
- Flowerfield Families
-
For Kids
- Day 1 - Build Your Own Lego Volcano!
- Day 2 - Create your own House!
- Day 3 - Draw your Own Underwater Picture
- Day 4 - Draw a Rainbow!
- Day 5 - Create your own Finger Print Tree!
- Day 6 - Draw a Spring Picture!
- Day 7 - Make your own Bird Feeder
- Day 8 - Design Your Own Easter Egg
- Day 9 - Draw an Easter Bunny
- Day 10 - Make your own Easter Basket
- Day 11 - Make an Easter Wreath
- Day 12 - Easter Camp in
- Day 13 - Create your own Superhero Mask!
- Day 14 - Draw your own Superhero!
- Day 15 - Create your own Comic Book Strip!
- Day 16 - Teddy Bears Picnic
- Day 17 - Draw a Beach Picture
- Day 18 - Play our Boredom Breaking Bingo!
- Day 19 - Draw a Picture of Outer Space!
- Day 20 - Write a Poem about Space!
- Day 21 - Have a Costume Party!
- Day 22 - Paint with Nature!
- Day 23 - Make a Nature Mobile!
- Day 24 - Make your own Flower Fairy Collage!
- Day 25 - Make your own Nature Fairy Wand!
- Day 26 - Join our May Lego Challenge!
- Day 27 - Make your Own Party Bunting!
- Day 28 - Draw a Sunset Picture!
- Bank Holiday Weekend Stay Home Scavenger Hunt!
- Day 30 - Write your own Short Story!
- Day 31 - Poem on your Pillow Day!
- Day 32 - Illustrate a Scene from your Favourite Book!
- Day 33 - Write a True Story!
- Weekend Challenge - Have a read-a-thon!
- Weekend Challenge - Draw a Family Portrait!
- Day 35 - Get Creative with Movement!
- Day 36 - Try a 1 Minute Meditation for Sleep!
- Day 37 - Take a Family Colouring Break
- Day 38 - Draw a Forest Picture
- Day 39 - Create a Creature with Nature!
- Try Leaf Painting and Printing!
- Weekend Challenge - Create your own Fairy House!
- For Adults
- Music
- Sound Connections
- Gallery tours for schools